
Unboxing: What’s REALLY in the Box?
So, you’ve just gotten your brand-new Vevor Leather Embossing Machine exciting! But before you dive into creating beautiful stamped leather designs, there’s one crucial step most guides skip: the unboxing reality check.
Why This Step Matters
Many users rush through unboxing, only to realize later that they’re missing a screw, a plate, or even the power cord. Trust me I learned this the hard way. After setting up multiple Vevor machines, I’ve put together this foolproof checklist so you don’t waste time (or sanity) later.
Step 1: Lay Everything Out
Gently unbox the package and arrange all the components on a tidy, brightly lit work surface.. Here’s what should be included:
Main Embossing Unit (the heavy metal press)
Heating Plates (usually two top and bottom)
Screws & Bolts (often hidden under foam or in small bags)
Pressure Adjustment Knob (sometimes pre-attached)
Power Cord (check for frayed wires)
User Manual (often generic don’t rely on it alone)
Pro Tip: Take photos as you unbox. If something’s missing, Vevor’s customer service will ask for proof.
Step 2: The “Hidden Parts” Hunt
Vevor machines often tuck away tiny parts in unexpected places, making them easy to overlook.
- Under the foam inserts (lift them all the way out).
- Taped to the inside walls of the box (run your hands along the cardboard).
- Inside the manual’s plastic sleeve (yes, really).
“I nearly tossed out my screws without realizing they were taped underneath the foam!” – Reddit User
Step 3: Check for Damage
Inspect for:
- Bent plates (run a ruler across them should be perfectly flat).
- Frayed cords (fire hazard demand a replacement immediately).
- Missing insulation pads (critical for heat protection).
What to Do If Something’s Missing/Damaged:
- “Kindly reach out to Vevor right away, including your order # and pictures of the issue.”
- Request expedited shipping for missing parts.
- Never try to set up warped plates they’ll just mess up your work.
Step 4: Gather Your Tools
- The manual says no tools are required, but here’s what you’ll really need:”
- Phillips screwdriver (for plate attachment).
- Isopropyl alcohol & cloth (to clean factory grease off plates).
- Level (to ensure plates are perfectly aligned critical for even embossing).
Skip This = Big Regrets
Without a level, your impressions will be lopsided, and fixing it later is a headache.
Step 5: Pre-Cleaning (Most Skip This!)
New machines often have industrial residue on plates that can:
- Cause uneven heating.
- Leave greasy stains on leather.
Fix:
- Dip a cloth in 70% isopropyl alcohol.
- Wipe plates thoroughly until no black residue appears.
- Let dry completely before heating.
“But My Box Didn’t Include…”
Common missing parts and fixes:
- Missing Part Quick Fix
- Screws Hardware store M4 bolts (bring a sample).
- Power Cord Use a universal 3-prong cord (check voltage match).
- Insulation Pads Temporarily use high-heat ceramic tape (Amazon).
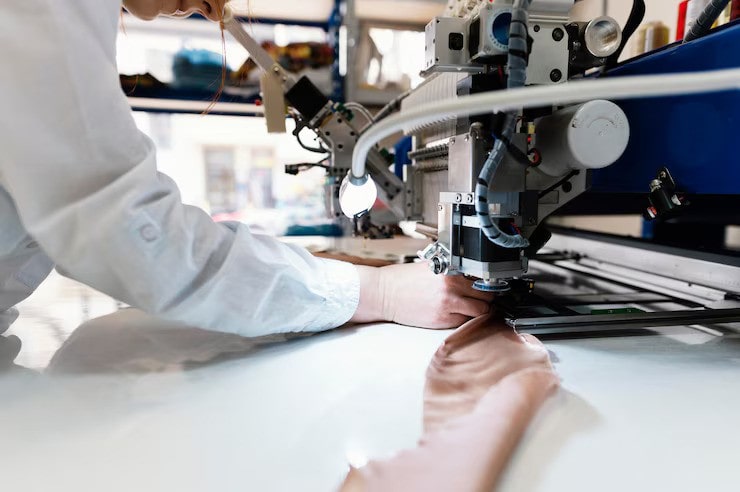
Assembly: Step-by-Step Guide to Perfect Setup
Now that you’ve unboxed and inspected your Vevor machine, let’s assemble it correctly. Most users rush this step, leading to misaligned plates and uneven embossing. Follow these foolproof steps:
Attach the Heating Plates
- Place the bottom plate on the machine bed, aligning the screw holes.
- Start by hand-tightening the screws, then finish with a quarter-turn using a screwdriver for a secure fit.
- Pro Tip: Place a level on the plate to ensure it’s perfectly flat.
Secure the Top Plate
- Align it with the bottom plate, leaving a 1mm gap for leather thickness.
- Tighten screws diagonally (like a car tire) to distribute pressure evenly.
Adjust the Pressure Knob
- Rotate the tool clockwise to increase pressure, perfect for thick leather, or turn it counterclockwise for lighter pressure when working on delicate materials.”
- Test on scrap leather: A good impression should be crisp but not cut through the material.
Calibration: Heat & Pressure Settings for Perfect Results
Your Vevor machine’s manual gives generic settings, but here’s what actually works:
Temperature Guide
- Thin Leather (1-2oz): 300°F – Prevents scorching.
- Tooling Leather (8-10oz): 350°F – Ensures deep impressions.
- Foil Stamping: 325°F – Avoid melting adhesive.
Pressure Adjustments
- Light: For foils and delicate designs.
- Heavy: For debossing or thick leather.
Troubleshooting Tip: If impressions are faint, increase temperature before pressure over-tightening can warp plates.
“Why Won’t My Plates Heat?” Troubleshooting
Common issues and fixes:
No Power?
- Check the outlet with another device.
- Ensure the cord is fully plugged into the machine (it’s deeper than you think).
Plates Warm But Not Hot Enough?
- Reset the thermostat by unplugging for 10 minutes.
- Clean plate contacts with alcohol (dirt disrupts heat transfer).
Error Codes?
- E1: Overheating → Let cool for 30 mins.
- E2: Electrical fault → Contact Vevor support.
Safety Note: Never bypass error codes you risk melting internal wiring.
Brand Showdown: Vevor vs. Hotronix
Wondering if you should’ve bought a Hotronix instead? Here’s the real deal:
- Feature Vevor Hotronix
- Setup Time 15 mins 1+ hour (pro install recommended)
- Price $200-$300 $600-$1,200
- Auto-Shutoff No Yes
- Best For Hobbyists Professional shops
“In the end, Vevor is the top pick for newcomers, whereas Hotronix excels in lasting durability, especially with regular use.”
Pro Maintenance: Keep Your Machine Running Smoothly
Extend your machine’s lifespan with these habits:
Daily:
- Wipe plates with alcohol to remove adhesive residue.
- Check screws for looseness (heat vibration can untighten them).
Monthly:
- Inspect the power cord for fraying.
- Lubricate the pressure knob with heat-safe grease.
Storage Tip: Cover the machine with a cloth to prevent dust buildup.
FAQ: Quick Answers to Common Questions
Q: Can I emboss faux leather?
A: Yes, but keep temps under 300°F higher heat melts synthetic materials.
Q: Why is my foil sticking to the plates?
A: You’re overheating. “For better outcomes, lower the heat by 25°F and switch to using a non-stick Teflon baking sheet.”
Q: How long do plates last?
A: 1-2 years with proper care. Replace if impressions become uneven.

1 thought on “How to Setup Vevor Leather Embossing Machine (Avoid These 3 Mistakes!)”