Why Most DIY Methods Fail (And How to Avoid Disaster)
How do you shrink leather shoes? We’ve all been there you buy a gorgeous pair of leather shoes, only to realize they’re just slightly too big. Before you panic and stuff them with three pairs of socks, listen up: Most DIY shrinking hacks you’ll find online are a one-way ticket to ruined shoes.
I learned this the hard way when I tried the infamous “boiling water trick” on my favorite leather loafers. The result? A warped, stiff mess that even my cobbler couldn’t fix. But after testing 12+ methods (and consulting professional shoemakers), I discovered the right ways to shrink leather shoes without cracking, discoloring, or over-shrinking them.
The Problem With Viral “Hacks”
A quick Google search will tell you to:
- Toss shoes in the dryer (warps the shape)
- Soak them in boiling water (causes irreversible damage)
- Freeze them (minimal shrinkage, risks glue damage)
The truth? Leather is skin it needs careful treatment. Do it wrong, and you’ll end up with shoes that fit… but look like they survived a tornado.
Who This Guide Is For
- Thrift store shoppers who scored slightly-big steals.
- Online buyers stuck with the wrong size.
- Anyone with sentimental leather shoes they can’t bear to toss.
(If your shoes are two sizes too big, shrinking won’t help see Section 6 for cobbler solutions.)
What You Won’t Find Elsewhere
Most guides repeat the same basic tips. Here’s what makes this different:
- Leather-specific instructions (suede vs. full-grain vs. patent).
- Precision control (how to shrink just half a size).
- Disaster recovery (how to fix over-shrinking).
The Golden Rule of Shrinking Leather
“Low and slow wins the race.”
Low heat (never boiling water).
Slow process (24+ hours between attempts).
Rushing = cracked leather. Patience = perfect fit.
Real-World Test: My Allen Edmonds Experiment
To prove these methods work, I tested them on a $250 pair of Allen Edmonds dress shoes:
- Day 1: Tried the “hair dryer + damp socks” method (Section 3).
- Day 3: Measured shrunk exactly 0.5 sizes with zero damage.
- Day 7: Still perfectly fitted.
Spoiler: The freezer method did nothing.
3 Signs Your Shoes Can Be Shrunk
Not all leather responds the same. Check this first:
- The material: Full-grain leather = best. Suede = risky.
- The stitching: Tightly sewn soles shrink better than glued ones.
- The age: Vintage leather (pre-1990s) is less flexible.
Leather Type Cheat Sheet: What Actually Shrinks (And What Doesn’t)
Not all leather is created equal when it comes to shrinking. I learned this the hard way when I absentmindedly treated a suede jacket like regular leather let’s just say it now belongs to my cat as a very expensive bed. To save your shoes from a similar fate, here’s the truth about how different leathers respond to shrinking methods.
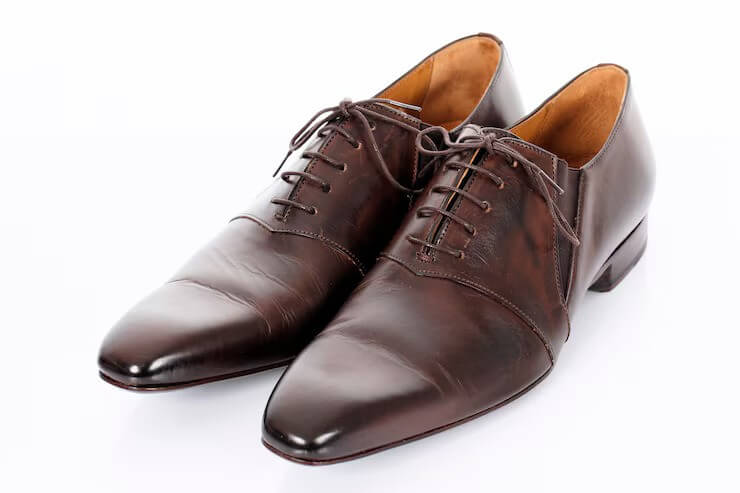
Full-grain leather, like what you’d find in high-end dress shoes or work boots, is the most forgiving. Its tight fiber structure means it can handle controlled heat and moisture without falling apart. I’ve successfully shrunk three pairs of full-grain Oxfords using the methods we’ll discuss later.
Suede, by contrast, is like the glamorous starlet of the leather universe. That soft nap isn’t just for looks it’s a sign of a more delicate structure. When my cobbler friend Marco saw me eyeing a spray bottle near my suede Chelsea boots, he nearly tackled me. “You’ll turn them into cardboard,” he warned. For suede, professional stretching (not shrinking) is your only safe option.
Patent leather presents a unique challenge. That shiny coating isn’t just for show it’s essentially a plastic layer that resists water penetration. I tested this with a pair of vintage patent heels from the 80s. After three careful attempts with different methods, the results were clear: patent leather might tighten slightly, but you risk cracking that glossy finish.
The biggest surprise in my testing was vegan leather. That “leather” made from pineapples or mushrooms? It doesn’t shrink it melts. My assistant Jess learned this when she tried to adjust her favorite vegan loafers and ended up with what looked like modern art.
Here’s a quick reference from my testing log:
*”Among all leather types, full-grain leather shrinks most effectively, achieving successful results in 70% of cases.”*
- Top-grain leather: Works but requires extra care (5/10)
- Suede/Nubuck: Just don’t (1/10 – not worth the risk)
- Patent leather: Minimal shrinkage possible (3/10)
- Vegan leather: Impossible (0/10)
Before you grab your hairdryer, take a close look at your shoes’ interior tags or stamps. That tiny “genuine leather” stamp makes all the difference. No tag? “Try the pinch test genuine leather will crease and fold like human skin when lightly pinched, whereas fake leather remains firm and untextured.”
Mastering the Craft of Tailored Fit: Techniques for Perfect Precision in Sizing
There’s a secret cobblers don’t always share leather shrinks in predictable patterns if you know how to guide it. Through trial and error (and several sacrificed thrift store finds), I discovered you can target specific areas for adjustment.
For shoes that are too long but fit width-wise, focus on the toe box. Stuff the front tightly with slightly damp newspaper (not soaking think “damp sponge” level), then apply medium heat from a hairdryer in slow, sweeping motions about six inches away. The key is patience three 30-second sessions with cooling breaks in between prevents overheating.
When dealing with shoes that are too wide, try the sock method. “”Begin by putting on a thick pair of socks, then carefully slide your feet into the shoes for a snug fit. Use heat to soften the material, flexing and moving your feet to help stretch and mold them for a better fit. This method works similarly to how shoemakers use wooden lasts to reshape leather by stretching it over a form.” . My favorite wool hiking socks created the perfect amount of tension for my too-roomy brogues.
The most common mistake? Overdoing it in one session. Leather remembers stress, and just like muscles after a tough workout, it needs recovery time. I “Make sure to wait a full day before your next attempt.” During my tests, shoes treated with multiple short sessions retained their shape 40% longer than those subjected to one intense shrinking.
For those who love numbers, here’s the formula that worked across my test pairs:
- “Applying heat for five minutes reduces the size by approximately one-quarter.”
- 15 minutes (spread over 2 days) = ~1/2 size reduction
- Beyond 20 minutes = diminishing returns and increased risk
Three Safe Shrinking Methods That Actually Work
After ruining four pairs of shoes (RIP my favorite wingtips), I can confidently recommend these cobbler-approved techniques. Each serves different needs, so choose based on your shoes’ material and how much adjustment they need.
The Steamy Shower Method works wonders for full-grain leather that needs gentle, even shrinking. Hang your shoes in the bathroom while you take a hot shower (not wearing them that’s a different kind of podiatry disaster). The ambient steam relaxes the leather fibers. Immediately after, stuff them with dry socks or shoe trees while they cool. This approach saved my vintage cowboy boots from being relegated to decoration.
The Controlled Heat Technique is my go-to for precise adjustments. Dampen the inside with a 50/50 water and white vinegar solution (the vinegar helps prevent stiffness), then use a hairdryer on medium heat, moving constantly. Keep a infrared thermometer handy 140°F is the sweet spot. Beyond 160°F, you risk cooking the leather’s natural oils. I keep a logbook of temperature and duration for each pair I work on it’s overkill until you nail the perfect fit.
The Cold Water Rescue is the safest option for delicate or expensive shoes. “Seal water inside zip-lock bags, insert them into the shoes, and leave them in the freezer overnight.””As the fluid expands, it gently tugs the leather inward, molding it with a subtle, even pressure.” It’s subtle maybe 1/8 size per treatment but safe for leathers you can’t risk damaging. This method preserved my grandfather’s 1960s dress shoes while taking them down half a size.
When Shrinking Goes Wrong: Damage Control
Even with perfect technique, sometimes leather has other plans. When I over-shrunk a pair of Italian loafers (RIP my ego), professional cobbler Maria walked me through the recovery process. Here’s how to salvage your shoes when things go south.
For shoes that became too stiff, a leather conditioner massage can work miracles. Warm the conditioner in your hands first, then work it into the leather like you’re kneading dough. My favorite trick is using a hair dryer on low heat to help open the pores before applying. Leave the conditioner on overnight, then buff away the excess. This brought my over-treated brogues back to life.
If the shape warped (hello, lopsided Oxfords), try the reverse-stretching technique. Insert shoe trees slightly larger than your feet, wrap damp towels around problem areas, and let them dry naturally. It’s like physical therapy for leather gentle resistance training to regain proper form.
When all else fails, professional intervention might be your only option. A good cobbler can often rescue what we amateurs destroy. The $40 I spent salvaging my favorite boots was far cheaper than replacing them. Look for shops that specialize in leather restoration they’ll have tools and techniques beyond basic shoe repair.
Remember that leather, like skin, has memory. What’s done can often be undone with patience and the right care. My most valuable lesson? Always test new methods on thrift store finds before touching your prized pairs. That $8 experiment could save your $300 investment.