The Chemistry of Cleaning: Why Clorox & Lysol Wipes Destroy Leather (And What to Use)
We’ve all been there. A spill on the couch, a smudge on the car seat, and the quickest solution seems to be that container of Clorox or Lysol wipes sitting on the counter. It’s tempting to grab one for a fast clean of your leather couch or leather car seats. But before you do, let me give it to you straight: this is one of the most common mistakes you can make, and it can lead to permanent, costly damage.
This isn’t just a matter of opinion; it’s a matter of basic chemistry. Leather isn’t a plastic countertop or a sealed surface. It’s a living, breathing material that requires specific care. Using disinfecting wipes on leather introduces harsh chemicals that it was never meant to handle.
In this guide, we’re going to look past the marketing and dive into the science. We’ll explain exactly how the active ingredients in these wipes work against your leather, breaking down its very structure. More importantly, we’ll give you the safe, effective, and simple alternatives to keep your leather looking pristine for years to come. So, if you’ve ever wondered, “Can I use Clorox wipes on leather?” the short answer is a firm no and here’s the fascinating why.
Understanding Your Leather: It’s Not a Plastic Countertop
Think of your favorite leather jacket or sofa. It’s soft, supple, and has a unique character. That’s because leather isn’t a synthetic, inert material like plastic; it’s essentially preserved animal skin. To understand why cleaning it wrong is so damaging, picture it like your own skin.
Leather is a porous material, filled with a network of tiny fibers made of a protein called collagen. Just like your skin needs natural oils to stay soft and not crack, leather relies on its own natural oils to remain flexible and strong. Over time, most leathers are also treated with a protective topcoat a thin layer that gives it color and a bit of shine, and helps guard against minor spills.
When you use a harsh cleaner, you’re not just wiping away dirt. You’re attacking this entire delicate system. The wrong chemicals can:
- Strip away the natural oils that keep the leather supple.
- Break down the collagen fibers, weakening the leather’s structure.
- Dull or dissolve the protective topcoat, leaving the leather vulnerable.
Once this damage is done, it’s often permanent. The leather loses its strength and flexibility, leading to the dreaded cracking and peeling we’ve all seen on neglected furniture and car interiors. So, the golden rule of leather care is simple: treat it with the same gentle respect you would your own skin.
A Forensic Look at the Damage Agents
Let’s play detective and examine the two main culprits: Clorox and Lysol wipes. What’s inside them that causes so much harm to leather?
Clorox Wipes: The Bleach Effect
The main active ingredient in most Clorox wipes is sodium hypochlorite common household bleach. Bleach is a powerful oxidizing agent. On your leather, it doesn’t clean; it attacks. It actively breaks down the chemical bonds in the dye, causing your leather to fade and become permanently discolored. It’s like spilling bleach on a colored t-shirt. Simultaneously, it breaks down the leather’s natural fibers and protective coating, making it brittle. This is the direct path to seeing your leather dry out and crack.
Lysol Wipes: The Drying Assault
You might think, “Well, I’ll just use Lysol wipes instead they don’t have bleach!” While that’s true, they are still a major threat. Their active ingredients, like ammonium chloride, are harsh detergents designed to dissolve grease and germs. On leather, these detergents are too effective. They emulsify and strip the natural oils right out of the hide. Imagine washing your hands with strong dish soap multiple times a day without ever using moisturizer. The result is the same: the material becomes dry, stiff, and primed to crack. So, whether it’s bleach or harsh detergents, the outcome for your leather is a disaster.
The pH Principle: Why Most Household Cleaners Are Unsafe
You might be wondering, “If these wipes are safe for my kitchen, why are they so bad for my couch?” The answer lies in a simple scientific concept: pH balance.
Think of the pH scale like a spectrum from acid to alkaline. Your leather is naturally slightly acidic, with a pH typically between 4 and 5. This acidic environment helps keep its protein fibers healthy and stable. Now, consider the ingredients in Clorox wipes and Lysol wipes. They are highly alkaline. When you introduce a strong alkaline substance to the leather’s acidic environment, it creates a chemical reaction that shocks and destabilizes the fibers.
This is like pouring a basic solution into an acidic one they violently neutralize each other. In your leather, this reaction permanently weakens the material, making it prone to drying, cracking, and color loss. This is the hidden danger of using all-purpose cleaners.
This is also why a proper leather cleaner is non-negotiable. These products are specifically formulated to be “pH-balanced,” meaning they clean effectively without throwing your leather’s essential chemistry out of whack. Using a pH-balanced cleaner is the single most important thing you can do for long-term leather care.
Building Your Safe Leather Cleaning Toolkit
Now for the good part: the safe and effective solutions. Building your own leather cleaning toolkit is simple, and you might already have some of these items at home.
Your Go-To Commercial Cleaner
When you’re at the store, skip the all-purpose cleaners and look for a bottle that says “leather cleaner” or “leather care.” The best ones will often be labeled “pH-balanced.” These are specifically engineered to lift dirt without harming the leather’s natural structure. They are your safest, most convenient bet for regular cleaning leather surfaces.
Your DIY Cleaning Solution
For a quick, effective, and inexpensive homemade leather cleaner, you only need two things: distilled water and white vinegar. Mix them in a 50/50 ratio in a spray bottle. The mild acidity of the vinegar is actually good for the leather’s pH. For tougher grime, add one drop of mild, unscented Castile soap to the mix.
The Golden Rule: Spot Test!
No matter which cleaner you choose store-bought or DIY leather cleaner this step is non-negotiable. Always test a small area first on a hidden spot (like a back cushion or under a seat). Apply the cleaner, then wait a full 24 hours to ensure it doesn’t cause discoloration or damage. This two-minute precaution can save you from a huge headache.
The Laboratory-Approved Leather Cleaning Protocol
You have your safe cleaners ready. Now, let’s use them correctly. Follow this simple, step-by-step guide to clean leather perfectly every time, whether it’s your leather couch, car seats, or a jacket.
The Spot Test: Yes, we’re mentioning it again because it’s that important. Never skip this.
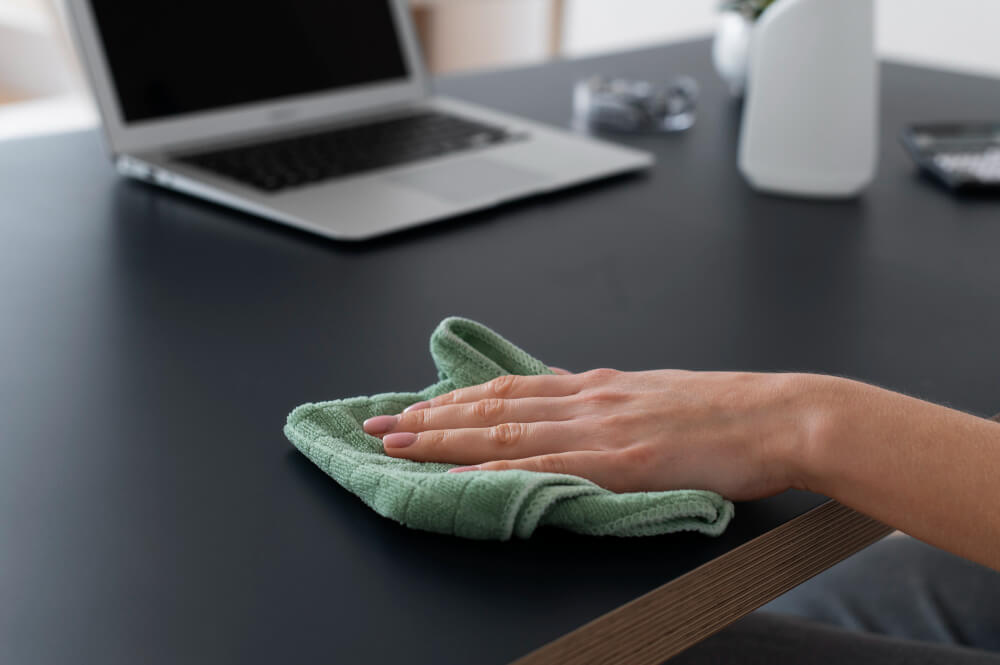
Dust First: Use a soft, dry microfiber cloth to gently wipe away all surface dust and debris. This prevents scratching during the wet cleaning.
Apply the Cleaner: Dampen a new microfiber cloth with your chosen cleaner. Do not spray the cleaner directly onto the leather, as oversaturation can cause water stains. Gently wipe the surface using small, circular motions.
Rinse (The Secret Step): This is often missed but crucial. Dampen another clean cloth with plain water and wipe over the area you just cleaned. This removes any leftover soapy residue that could attract more dirt.
Dry Thoroughly: Let the leather air dry naturally, away from direct heat or sunlight. Don’t use a hairdryer!
Condition to Replenish: This is the final, vital step. Once the leather is completely dry, apply a high-quality leather conditioner. This replenishes the natural oils that the cleaning process can remove, keeping your leather supple, protected, and looking like new.
Addressing Specific Stains: Beyond General Cleaning
Sometimes, life happens, and you’re faced with more than just everyday dust. Here’s how to tackle some common specific stains to remove stains from leather without causing harm.
Ink Stains: Don’t panic. Dampen a cotton swab with a tiny amount of isopropyl alcohol. Gently dab (don’t rub!) at the ink spot. The alcohol breaks down the ink. Because alcohol is drying, you must condition the leather immediately afterward in that spot.
Oil or Grease Stains: For this, you need an absorber. Sprinkle the spot with cornstarch or talcum powder. Let it sit for several hours, or even overnight. The powder will soak up the oil. Then, simply brush or vacuum it away.
Sticky Residue: For gum or a sticky label goo, a simple paste of baking soda and water can work wonders. Apply the paste, let it dry completely, and then gently wipe it away with a damp cloth.
Remember, the key with any stain treatment is to be gentle and patient. Rubbing aggressively can spread the stain or damage the leather’s surface. When in doubt, seeking a professional’s help is always the safest bet for valuable items.